Today GPS is ubiquitous. Weather you are in your car, walking through a city or out walking in the hills, GPS seems to be the way to go as far as navigation is concerned. Or is it?
Don’t get me wrong, I love GPS. I own several GPS-enabled devices and I use GPS navigation all the time. But what happens when your device’s batteries die, or you drop it in a puddle or an attacking alien fleet destroys all the GPS satellites? Then what? That’s why, even if you are using GPS, it’s always a good plan to have an analogue back up – a trusty map and compass. Yes – you can lose or destroy these too, but they tend to be less disaster prone.
So, in the spirit of reviving a dying art, here’s a visual guide to using your map and compass to take a bearing. Learn it quick before that alien fleet turns up – your iPhone is no good when you’re running for the hills!
For this technique you will need:
- a protractor compass
- a recently published map covering your current location and your intended destination
- knowledge of your current position on the map.
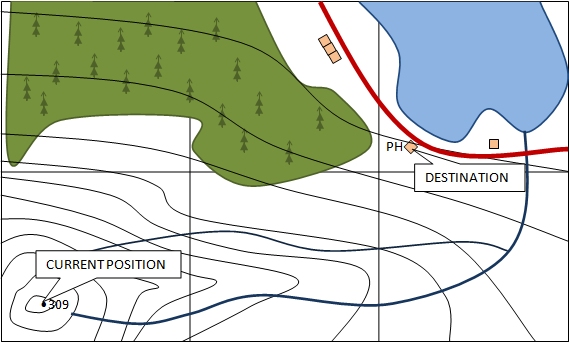
Step 1
Lay the map down on a flat surface so that you can see both your current position and your intended destination. The map does not have to be correctly aligned with the surrounding landscape. It is irrelevant which way the map is facing.
Step 2
Place your protractor compass on the map so that either one of the long edges runs along the line that passes between your current position and your destination. The direction of travel arrow on the compass should be pointing in the direction of your destination.
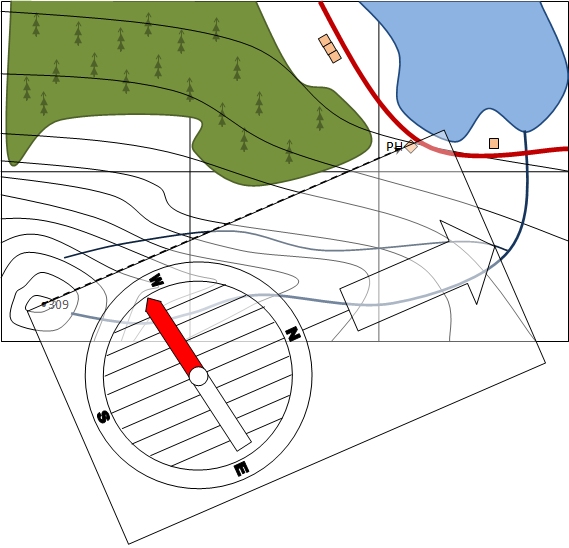
Step 3
Turn the compass housing until the orienting lines in the centre of the housing are parallel to the vertical grid lines on the map.
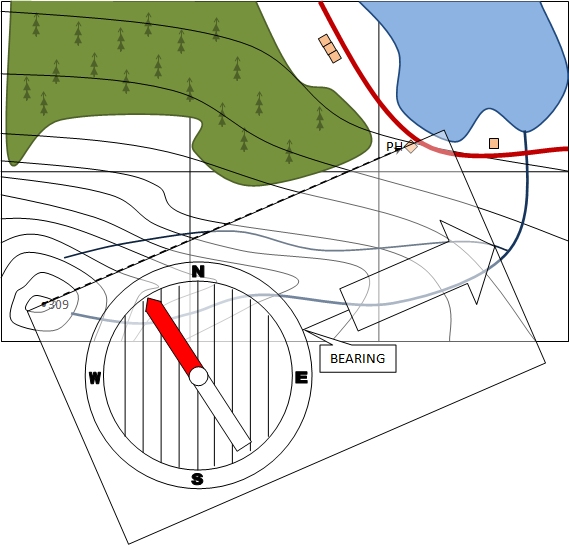
Step 4
Read off the bearing at the point where the index line (the line at the bottom of the direction of travel arrow) intersects with the compass housing.
Step 5
Depending on where you are in the world, you will now have to compensate for the difference between magnetic north and grid north. The map should tell you how many degrees to add to the bearing. Calculate the correct bearing and adjust the compass housing so that the revised bearing is just below the index line.
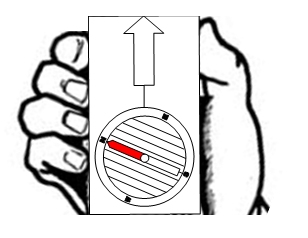
Step 6
To navigate with the compass, hold it flat in front of you, with the direction of travel arrow pointing away from you. Now turn on the spot until the red part of the needle points to north on the compass housing. You are now facing in the correct direction.
The images in this post were created by me using a variety of graphics tools (the hand illustration is a stock image).
Be First to Comment