You can see an index of all the posts in this series: go to index.
If you want to review my progress, here are the files from the end of the previous post: forms and javascript.
At the end of the previous post, I left myself with two things to consider. The first was to use my style sheet to make the submit button look pretty. Here’s my solution, added to the end of the CSS file.
.submit {
  background-color: #337788;
  color: white;
  padding: 6px;
  border: none;
  font-size: large;
  margin: 10px 0;
}
I’ve introduced a couple of new properties here. The border property controls whether a line is drawn around the edge of an element. Most browsers do draw a line around Submit buttons, which I don’t want, so I’m setting this to none to prevent that line being drawn. The font-size property does what its name suggests. You can give an exact font size, e.g. in pixels, or a relative font size using values like large, which I’m doing to give the button a bit more impact. You can see examples of all these values here. Note how I’ve also used a top and bottom margin of 10 pixels to separate the button from the other content a little bit.
The other thing I did was to modify the existing rule for a:hover, like this:
a:hover,
.submit:hover {
  background-color: #4499aa;
}
I want this button to have the same lighter colour when the cursor moves over it, as I’ve used for the link. If I have two selectors that share the same rule, then I can simply separate those selectors with a comma, as I’ve done here.
You’ll notice that the selector I’ve been using for these is .submit which applies to a class of submit. I hinted at this in the last post when I mentioned that I couldn’t use input as the selector, as this would also apply the same style to the radio buttons. The solution then is to create a new class and apply that class to the submit button. That change to my index.html file looks like this:
<input type="submit" class="submit">
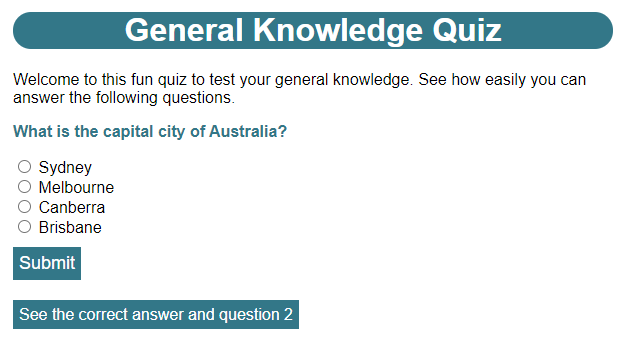
The end result looks like this:
Although using a class works fine here, and is a perfectly reasonable solution, there is another way I could have handled the problem of not being able to use the input selector. CSS also let’s me select elements with a particular attribute set to a particular value. To see this in action, I’ll remove the class attribute from my submit button, so it just looks like this:
<input type="submit">
Now I change the .submit rules in my CSS code to this:
a:hover,
input[type='submit']:hover {
  background-color: #4499aa;
}
and this:
input[type='submit'] {
  background-color: #337788;
  color: white;
  padding: 6px;
  border: none;
  font-size: large;
  margin: 10px 0;
}
These rules will now only match input elements with a type attribute equal to submit. When I refresh the page in my browser I see no change, which indicates the new rules are working.
The other thing I wanted to give some consideration to was to see if I could find out how to style the alert box I’ve been using. Looking into this it quickly becomes apparent that I can’t. As far as alert is concerned, I get what I’m given. The reason for this is that the alert box is not part of the web page, it’s a feature of the browser, and therefore it’s not an element that will be affected by CSS. So is there an alternative to using the alert box to let a player know whether they answered correctly or not? Yes there is. I updated my index.html to look like this (changes are highlighted):
<!DOCTYPE html>
<html lang="en" dir="ltr">
  <head>
    <meta charset="utf-8">
    <title>General Knowledge Quiz</title>
    <link rel="stylesheet" href="css/quiz.css">
  </head>
  <body>
    <h1>General Knowledge Quiz</h1>
    <p>Welcome to this fun quiz to test your general knowledge. See how easily you can answer the following questions.</p>
    <p class="question">What is the capital city of Australia?</p>
    <form action="index.html" method="GET">
      <input type="radio" id="option1" name="answer" value="1"> <label for="option1">Sydney</label><br>
      <input type="radio" id="option2" name="answer" value="2"> <label for="option2">Melbourne</label><br>
      <input type="radio" id="option3" name="answer" value="3"> <label for="option3">Canberra</label><br>
      <input type="radio" id="option4" name="answer" value="4"> <label for="option4">Brisbane</label><br>
      <input type="submit">
    </form>
    <p class="hidden" id="correct"><strong>That's correct!</strong> Now try the next question...</p>
    <p class="hidden" id="incorrect"><strong>Sorry! That's not the right answer!</strong> Try again...</p>
    <p class="hidden" id="nextQuestion"><a href="question2.html">See question 2</a></p>
    <!--
    <script>
      let formValues = new URLSearchParams(window.location.search);
      let result = 'incorrect!\nTry again or go to the next question';
      let answer = formValues.get('answer');

      if (answer == '3') {
        result = 'correct!\nGo to the next question';
      }

      if (answer != null) {
          alert('Your answer is ' + result);
      }
    </script>
    -->
  </body>
</html>
I’ve added two paragraphs, one to announce the player is correct, and one to announce the player is incorrect and I’ve given both of these the class of hidden. Note that I’ve also given the class of hidden to the paragraph element that contains the link to the next question, and I’ve given each of these things an id attribute with a unique ID.
The <!– and –> are how I enclose comments in HTML. Comments are a useful feature that allow me to document my code so that I or another person reading it can understand what it’s doing. The browser will completely ignore anything inside a comment block. Because it does this, I can also use a comment block to temporarily disable a part of my HTML file and that’s what I’m doing here to stop the JavaScript from running.
Looking at the file in the browser at the moment, I see this:
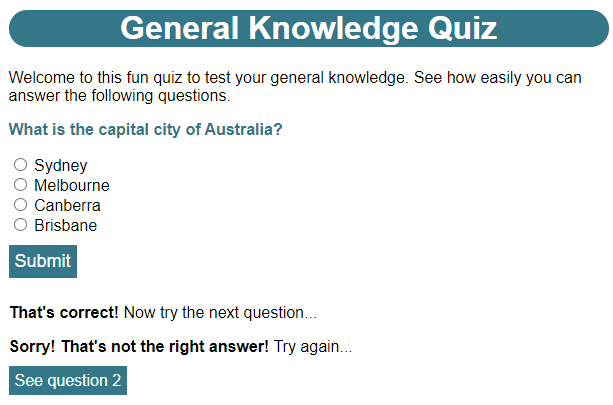
I haven’t even answered the question yet, but I’m getting feedback for both a correct and an incorrect answer! I need to add the following rule to the bottom of my CSS file:
.hidden {
  display: none;
}
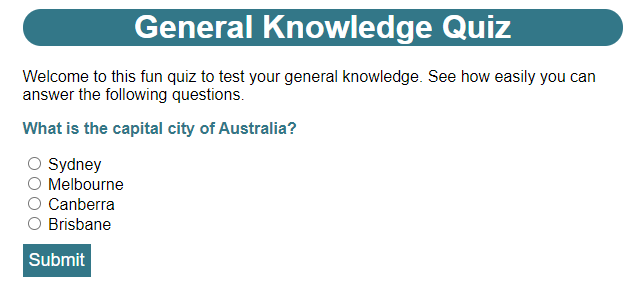
You can see this is a rule that selects the class I’ve just added to my HTML file. The display property controls how an element is displayed. I said in a previous post that I could change whether an element was treated as block-level or inline. Well display is how I do it. If I use display: block; with an inline element for example, it will start to behave like a block-level element. When I use display: none; the element is not displayed at all, as I can see when I save the file and refresh the page in the browser:
OK so, how do I get those things back again when I need them? To do that I have to combine the power of JavaScript with something called the Document Object Model or DOM. The DOM is a representation of the HTML page that the browser constructs and we can use JavaScript to read and manipulate it.
Remove the comment block that’s enclosing your script element and then change your script to look like this (changes are highlighted):
      let formValues = new URLSearchParams(window.location.search);
      let result = 'incorrect!\nTry again or go to the next question';
      let answer = formValues.get('answer');
      let correctFeedback = document.querySelector('#correct');
      let incorrectFeedback = document.querySelector('#incorrect');
      let nextQuestion = document.querySelector('#nextQuestion');

      if (answer == '3') {
        correctFeedback.classList.remove('hidden');
        nextQuestion.classList.remove('hidden');
      } else if (answer != null) {
        incorrectFeedback.classList.remove('hidden');
      }
You can see that I’m creating three new variables, correctFeedback, incorrectFeedback, and nextQuestion. These will contain references to the parts of my HTML page that I’ve hidden. To get these I use the document object constructed by the browser. You can see this is followed by a dot (.) and then the name of a function. You’ve seen this before when I used it to access a function in a URLSearchParams object.
Objects in JavaScript are structures that can hold both functions and data. To access a function or data in an object I use dot notation, by using a full stop or period character (.) to separate the name of the object from the name of the function or data I want. So when I use document.querySelector(‘#correct’) what I’m doing is called the function querySelector, within the document object, with an argument of ‘#correct’.
The querySelector function lets me find HTML elements by using CSS selectors. Selectors that start with # will find a matching elements with the unique id that follows, so ‘#correct’ will find any element that has an id attribute set to correct.
I’ll use these references to the hidden elements in the decision statements that come next.
I’ve already used a simple if statement in the quiz code. An if statement can optionally be followed by an else statement, which also has curly braces to surround some code. But while the code in the curly braces following the if statement is only run if the condition is true, the code in the else braces is only run if the condition is false.
I can also have an else if statement, as I do here. The code in the braces following an else if statement will only be run if the proceeding if statement evaluates as false and its own condition evaluates as true. An example of how these work together is:
if the store has oat milk
   buy that
else if the store has soya milk
   buy that
else
   buy low fat cow's milk
You can see that with this structure, only one of the “buy” instructions is executed, depending on what kinds of milk the store has.
So my decisions are to first check if the correct answer was given on line 30, and if it was I remove the ‘hidden’ class from the correct feedback and the link to the next question, which causes them to appear. Notice that I am using two levels of dot notation here. First I’m finding the classList object in the HTML element. The classList object, as its name suggests, returns a list of all the classes that apply to that element. Next I’m calling the remove function on this list, which removes the specified class from the element.
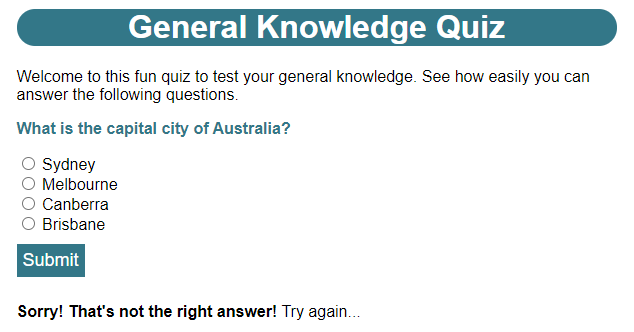
If there isn’t a correct answer, I can’t just assume a wrong answer has been given. As I did before, I have to check, on line 33, that answer isn’t null, which would indicate that the question has not yet been answered. Assuming it’s not null then it must contain a wrong answer, so I display the incorrect feedback inviting the player to try again.
So, in the browser, when I give an incorrect answer, I see this:
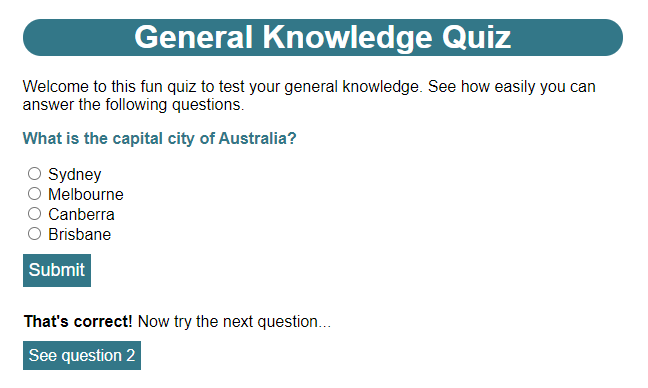
Then, when I enter the correct answer, I see this:
At the moment my script only exists in index.html. If I wanted the same functionality in the other two questions, I’d need to copy the whole script element and paste it into each of the other files. That might not seem too onerous, but it does mean, if I want to make a change to my code, I’ve got to make it in three different places (or more if I add further questions), Fortunately there is a way round this. Rather than embedding my JavaScript in the HTML file, I can place it in its own file.
First I’ll create somewhere to put these files. Inside my quiz folder, I created a new folder called js. Inside that, I created an empty file called quiz.js. Then I entered the following code in my new file.
function checkAnswer() {
  let formValues = new URLSearchParams(window.location.search);
  let result = 'incorrect!\nTry again or go to the next question';
  let answer = formValues.get('answer');
  let correctFeedback = document.querySelector('#correct');
  let incorrectFeedback = document.querySelector('#incorrect');
  let nextQuestion = document.querySelector('#nextQuestion');

  if (answer == '3') {
    correctFeedback.classList.remove('hidden');
    nextQuestion.classList.remove('hidden');
  } else if (answer != null) {
    incorrectFeedback.classList.remove('hidden');
  }
}
You can see that this is largely the same as the code I have in my HTML file, except that it’s now inside a function. In JavaScript, as well as using the built-in functions, I can define my own. The way I do this is with the keyword function, followed by the function name, e.g checkAnswer, followed by parentheses listing the required parameters. In this case I don’t have any parameters, so the parentheses are empty (later I’ll show examples of defining functions with parameters). These are followed by a pair of curly braces containing the code that forms the function body.
To make use of the JavaScript in this file I first have to load it in an HTML file. In index.html, I made the following changes (highlighted):
<!DOCTYPE html>
<html lang="en" dir="ltr">
  <head>
    <meta charset="utf-8">
    <title>General Knowledge Quiz</title>
    <link rel="stylesheet" href="css/quiz.css">
    <script src="js/quiz.js"></script>
  </head>
  <body>
    <h1>General Knowledge Quiz</h1>
    <p>Welcome to this fun quiz to test your general knowledge. See how easily you can answer the following questions.</p>
    <p class="question">What is the capital city of Australia?</p>
    <form action="index.html" method="GET">
      <input type="radio" id="option1" name="answer" value="1"> <label for="option1">Sydney</label><br>
      <input type="radio" id="option2" name="answer" value="2"> <label for="option2">Melbourne</label><br>
      <input type="radio" id="option3" name="answer" value="3"> <label for="option3">Canberra</label><br>
      <input type="radio" id="option4" name="answer" value="4"> <label for="option4">Brisbane</label><br>
      <input type="submit">
    </form>
    <p class="hidden" id="correct"><strong>That's correct!</strong> Now try the next question...</p>
    <p class="hidden" id="incorrect"><strong>Sorry! That's not the right answer!</strong> Try again...</p>
    <p class="hidden" id="nextQuestion"><a href="question2.html">See question 2</a></p>
    <script>
      document.addEventListener('DOMContentLoaded', checkAnswer);
    </script>
  </body>
</html>
You can see I now have a new script element inside the head element. This script element doesn’t contain any code, but it does have a src attribute. You’ve seen this before with the img element, where I used it to indicate the location of the image to be displayed. It has the same function here, except that it’s the location of a JavaScript file to be loaded. Note that, even when I use the script element in this way, I must still include the closing tag.
Where my original script used to be, at the bottom of the body element, I still have a script element, but it consists of just a single line of code. This uses a function of the document object called addEventListener. An event listener waits until it receives notification that a particular event has happened and then it executes a function. It expects two arguments. The first is the event it should listen for and the second is the function it should run.
The event I am listening for is DOMContentLoaded. This event is triggered when the HTML document has been completely loaded and the browser has finished building the document object model. At this point it will execute the checkAnswer function that I created in the external JavaScript file. Note that I include the name of the function only, without parentheses.
Why do I need to do this? The current version of my function accesses and manipulates DOM elements within the document object. If I try to run my code straight away, it’s possible that the browser might still be reading the HTML file and building the document object. In this case, when I try to access those elements, they might not exists and I’d get errors in my function. By waiting until the document object is complete, I can be sure that when my code is executed, the elements it is trying to reference will be there.
It’s also the reason why I put any JavaScript initialisation code at the end of the body element. By the time the browser reads and interprets this code, it should have already read and parsed all other elements. However, it’s best not to assume that means the document object is ready, which is why I adopt the belt and braces approach of having the initialisation script at the end of body and waiting for the DOMContentLoaded event.
Saving the file and loading it in the browser, satisfies me that it behaves in exactly the same way as it did before. The advantage is that I now have most of the code in an external file which I can load in any HTML page that needs it.
One small annoying feature of my current game you might have noticed, is that because I’m using a form, when I submit an answer it reloads the page to give me the answer in the URL and that means that the form resets and I can no longer see which answer was selected.
The first challenge I’ll try to solve for the next post in this series, is to add some code that will remind the user what answer they selected before I tell them whether their answer was correct or incorrect. I should be able to do this using if … else if … else statements and by making use of the hidden class I’ve already created.
My second challenge is to think about whether my JavaScript function will work correctly if I try to use it with question2.html and question3.html. Looking carefully at the code I can spot two problems – one which affects both questions and another which is specific to question 2. I’ll look at solutions for these challenges in the next post.
Be First to Comment