NOTE: This post was originally published in October 2013 and the script described here has not been tested with recent versions of Omnigraffle, AppleScript or Mac OS X and may not accurately describe current features of Omnigraffle. It’s included here for the benefit of Omnigraffle users who might want to develop something along similar lines.
Like a lot of Mac users I’m a big fan of the Omni Group’s Omnigraffle. One of the areas where Omnigraffle really excels over other diagramming software is in its handling of connections. Connections, which are so often a source of frustration in other software, are a breeze in Omnigraffle and one of the features that makes them so easy is magnets.
That being said, one limitation I’ve come up against is that Omnigraffle allows you a maximum of five magnets per side when you want to place and distribute them automatically. For some types of diagram, circuit or logic diagrams in particular, I will often need more than five connections from the side of a shape. Yes, I know I can add further magnets manually, and yes, I know I could use a grid to ensure they are distributed evenly. But frankly, who wants to waste their valuable time painstakingly placing individual magnets? Not me – that’s for sure.
AppleScript to the rescue! Fortunately, Omnigraffle has excellent AppleScript support, so with an afternoon’s work I was able to create a script that would allow me to have an arbitrary number of magnets along the side of a shape. Since I’ve gone to the trouble of creating a script, I’ve also programmed it to give me the option of including the corners of the shape or not and of selecting which sides of the shape the magnets should be applied to.
Here’s an example of the script at work.
I’m starting with a large rectangle with no magnets, which I select before running the script:

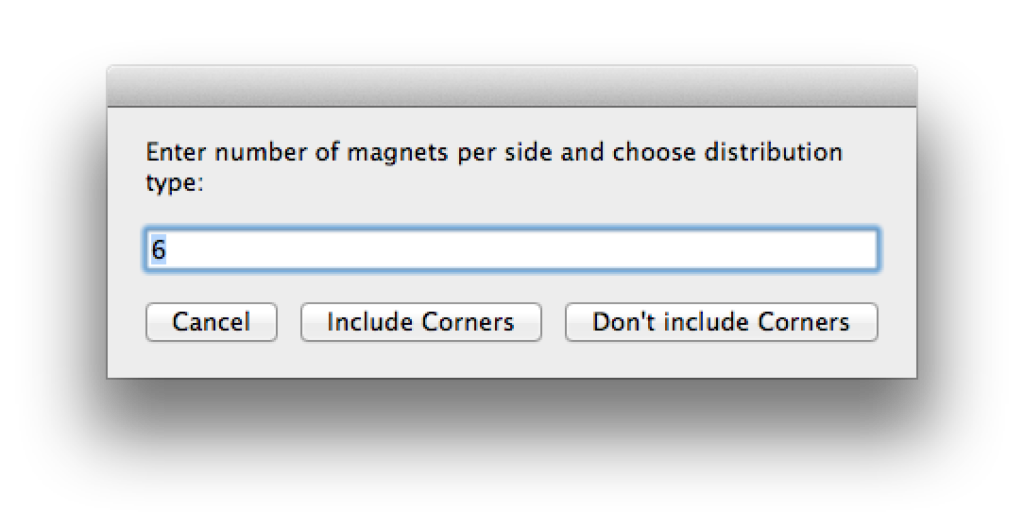
When I run the script it asks me for the number of magnets I want on a side and whether I want them to be distributed including the corners or not including the corners.
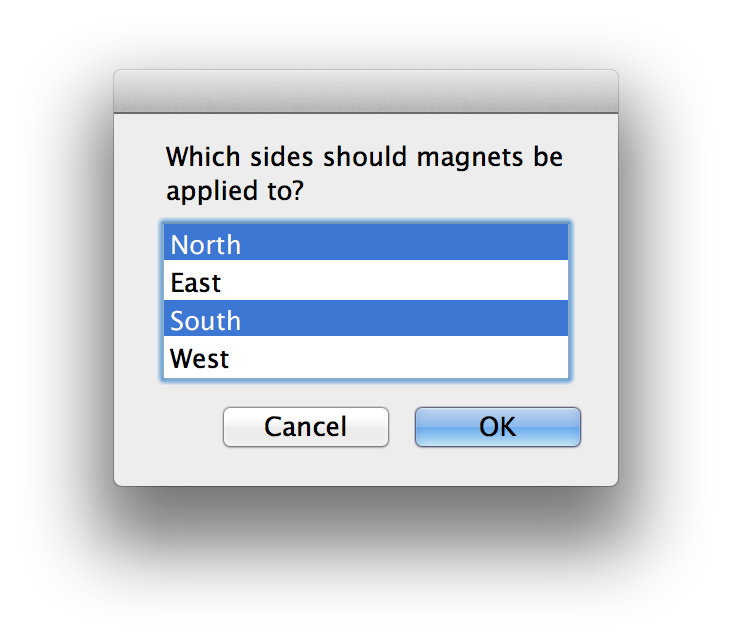
Now it asks me to select the sides I want to apply them to.
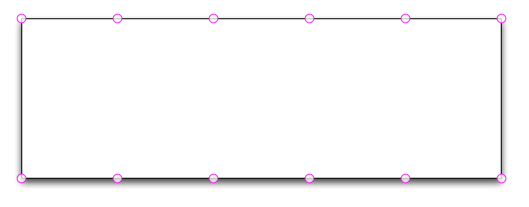
And that’s it – here’s my rectangle with the magnets applied and evenly distributed as requested.
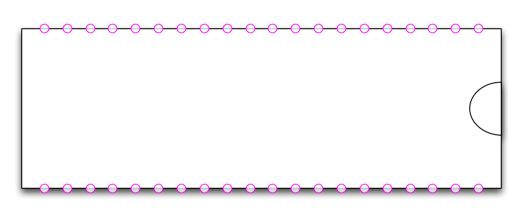
So what about a typical real world application. Well let’s say you are creating a circuit or logic diagram which includes a 40 pin integrated circuit. It would take you some time to set up a grid of the right size and apply twenty evenly spaced magnets to each side for the pin connections. But with my script it takes all of three seconds, and here’s the result:
So you can see how useful the script is when you have a large number of connections to create, but even with fewer connections its flexibility is quite handy. Here are some examples:
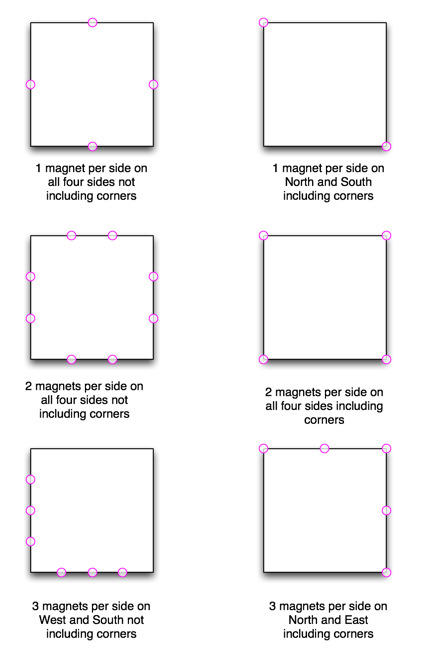
Notice the behaviour with corners. If you select just one magnet per side including corners, then the magnet will be placed on the leading corner of the side as you progress round the shape in a clockwise direction. It’s also worth noting that when corners are included and you have magnets on adjacent sides then the script is smart enough to place a single magnet at the shared corner – not two. Another point worth noting is that this script is intended to work with rectangles. It can be applied to other shapes, but the distribution of the magnets will not be even, because of the distorted edge of the shape. Also it works on all the shapes that are currently selected, so if nothing happens, check you have at least one shape selected. Any lines in the selection will be ignored.
Here’s the script, which you are free to use or adapt for your own work in Omnigraffle. NOTE: It’s been tested only with Omnigraffle Pro 5. I can’t guarantee it will work with other versions.
-- Add magnets to sides of rectangle
-- Laurence Scotford - October 2013

property num_mags : 6 -- number of magnets per side
set {North, East, South, West} to {1, 2, 3, 4} -- Enumerator for identifying the sides
set the_sides_list to {"North", "East", "South", "West"} -- List of strings for user choice
set corners to {{{-1, -1}, {1, -1}}, {{1, -1}, {1, 1}}, {{1, 1}, {-1, 1}}, {{-1, 1}, {-1, -1}}} -- positions of corner points for each side
set my_mags to {} -- empty list in which magnets will be assembled

-- ask the user for the number of magnets and whether to include corners or not
set err_message to ""
repeat
	try
		set the_result to display dialog "Enter number of magnets per side and choose distribution type:" & err_message default answer num_mags buttons {"Cancel", "Include Corners", "Don't include Corners"}
		set num_mags to text returned of the_result as integer
	on error number err_num
		-- if error is anything other than coercion error then throw it...
		if err_num is not -1700 then error number err_num
		-- …otherwise set number of magnets to zero and try again…
		set num_mags to 0
	end try
	-- if number of magnets is not a positive whole number, try again with error message
	if num_mags > 0 then exit repeat
	set err_message to return & "Please enter a positive whole number!"
end repeat

-- set whether to include corners or not based on user response
set including_corners to button returned of the_result is "Include Corners"

-- calculate number of magnets that will fall between corners-- and number of final magnet before corner
if including_corners then
	set inner_mags to num_mags - 2
else
	set inner_mags to num_mags
end if

-- Get the user to select the sides to apply to and then turn these into list of numeric values
set the_result to choose from list the_sides_list with prompt "Which sides should magnets be applied to?" with multiple selections allowed
set sides to {}
repeat with a_side from 1 to the count of the_sides_list
	if item a_side of the_sides_list is in the_result then copy a_side to end of sides
end repeat

-- create the magnets between corners (if there are any)
if inner_mags > 0 then
	repeat with mag_count from 1 to inner_mags
		set mag_pos to (2 / (inner_mags + 1)) * mag_count - 1
		if sides contains North then
			set end of my_mags to {mag_pos, -1}
		end if
		if sides contains East then
			set end of my_mags to {1, mag_pos}
		end if
		if sides contains South then
			set end of my_mags to {mag_pos, 1}
		end if
		if sides contains West then
			set end of my_mags to {-1, mag_pos}
		end if
	end repeat
end if

-- now add the corner magnets, if required
if including_corners then
	repeat with side in sides
		-- add the leading corner magnet (clockwise)
		set coords to item 1 of item (side as number) of corners
		if {coords} is not in my_mags then set end of my_mags to coords
		-- if there's more than one magnet per side, add the trailing corner magnet (clockwise)
		if num_mags > 1 then
			set coords to item 2 of item (side as number) of corners
			if {coords} is not in my_mags then set end of my_mags to coords
		end if
	end repeat
end if

-- apply the magnets to the selected shapes
tell application id "OGfl"
	tell front window
		set my_shapes to its selection
		repeat with drawn_object in my_shapes
			if class of drawn_object is shape then
				set magnets of drawn_object to my_mags
			end if
		end repeat
	end tell
end tell
Be First to Comment